Thursday, December 21, 2017

Unicorn Ornaments How-To


My Sisters ornament


For December I decided to host an Ornament party for the kiddos We  made a few different home made ornaments but the one I want to talk about is the one I've been asked alot about- 
the UNICORN.
This little beauty was so easy to make, super pretty and supplies were pretty easy to find if you know what you need. 

Supplies: 
The biggest stress-or for me was hunting down what I needed- I went to several stores when really I should of just gone to Walmart and Hobby Lobby! Heres my break down so you can get in and out of the store, especially during this crazy busy holiday season

Walmart:  Craft section - Large White glitter 
                 Cleaning Section - Pledge Floor cleaner
                 Mini Hot Glue Gun

Hobby Lobby:
       
          Thick Glitter Foam Paper - White and Pink ( 99 cents each, we made 13 ornaments so 1 sheet                                     of each was enough)
            Paper Flowers ( in the washi tape aisle) (5 bucks a pack- get 2 or 3. it is expensive but so                                             worth it)
            Sculpty Glitter Gold Clay - small pack is $2.99 this was more then enough- no need for the                                           big pack
             Black, White and Gold Paint Markers $2.99 each

       
Michael's : 
            Clear Ornaments 6 pack. They had the best  prices. I bought 4 box for under $20. 

How to make it!

Once you've gathered all your supplies, now you can start the fun! 

  1.  Make your Unicorn horn - I purposely bought Gold Glitter Clay so I didn't have to go back and apply glitter, I was so happy when I discovered the glitter sculpty! It looks dull in the package but once you bake it - its so pretty! You want to start here because you can bake these while you prep the rest of the ornament. Roll out your clay and wrap them to form a horn - I recommend you make them on the thicker side.  Place in the oven for 15min at 325 degree. I wrote everyone's name on aluminium foil so we knew whose horn was whose. It gets confusing with 13 people. 
  2. Prep your Ornament- remove the top and pour a generous amount of floor cleaner inside, swirl it around and then empty the excess. My sister came up with this great idea of place the ornament upside down in a plastic cup as shown here : 


3.  Using a small funnel or folding paper- pour the glitter inside the ornament and shake it around- DONT BE CHEAP WITH THE GLITTER- Pour alot! empty excess glitter out and toss it. 
4. Make your ears. Cut the White and Pink Glitter Foam into triangles and glue to the side of your ornament. Use your hot glue gun- it works wonderfully. 
4. Remove Horns from over, allow to cool
5. Using Your black or Gold paint marker - paint on your eyes and write the name of the back of ornament if you wish. 
6. Place your ornament cap back on, Hot Glue your Horn in the center and start to also glue your flowers and your done!


This was so easy and so fun for the kids, some of the kids even got creative and used different colors. Skys the limit! My Sister in law got really creative and used the gold paint marker to line her ears!


This was my little beauty! 
These sisters got really creative!

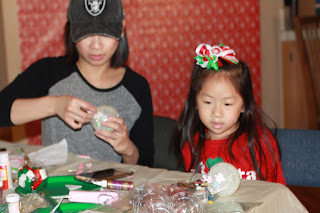
Here are some fun photos from our ornament party! I made an easy back drop for our photos using wrapper paper that I bought from the 99 cent store. One roll was plenty! Great way to add a festive back ground.




Thursday, November 16, 2017

4th Grade Native American Trade Activity


This month is my sons Social Studies month and they are focusing their studies on Native Americans. Part of this fun project is the kids are to make home made items, and bring them to class where they will trade these items with their class mates. My son chose to make Arrow Heads, His class seems to have more girls then boys so of course I had to think of some girly items to also make, hence the necklaces.


          As I was brainstorming how to make these arrow heads, I remembered a Salt Dough recipe I saw once. People often use these to make paw prints or ornaments. This stuff is really easy to make and once you bake them, they are hard and solid.  I started my Wednesday morning running to my local Walmart to get a few items I did not have. Some wooden dowels that were under $3 and 2 packs of feathers! 1.99 each I believe, while I was in the crafting section I came across a  bag of beads and the lightbulb moment came to make necklaces.


SALT DOUGH RECIPE
2 CUPS OF FLOUR
1 CUP OF SALT
1 CUP OF HOT WATER
1 TSP OF COOKING OIL


  MIX FLOUR  AND SALT

MIX IN HOT WATER AND OIL
KNEAD DOUGH ONCE IT COOLS


knead dough and roll into balls


Roll out dough with a rolling pin. 
Not to thick and not to thin.


I cut triangles and shaped them into "spears" and before placing them into an oven to bake, I placed the wooden dowl to make an imprint so that the dowel fit perfectly. 
BAKED IN OVER AT 400 degrees for 1 1/2 hours or until dough is dried. 


Once the spears where done baking, I let them cooled down then I painted them with black acrylic paint. 

Once the spears dried, I used my HOT GLUE GUN to glue the spears to the dowels and then I added an extra touch by wrapping twine around the spear and dowel. I super glued a few feathers and tied some twine around them to secure it for an extra added touch. 

____________________________________________________


Native American Inspired Necklace

These came out really cute, I'm really glad I made these and I hope my sons class mates enjoy them also.  I  started by cutting craft paper into round circles, 2 for each necklace - one for the front and one for the back. I hot glued a few feathers to one piece of circle paper and added twine , followed by gluing the second piece of  round paper to seal it all in.
 I added a few colorful beads and wallah!  A pretty necklace!


Monday, November 13, 2017

How to have a Fun Halloween Party for Kids!

Saechao Halloween 2015

In 2015 I threw a really fun Halloween party for the kids, My nieces still to this day ask when am I going to do another Halloween party.  I thought I was clever this year by making my own witch costume out of garbage bags. I still giggle when I see the pictures.

1. FOOD

Focal Point of the Party
The main attraction is going to be the food table, this is where you can get really creative. If your going to throw a party- invest your time and energy on the food area.
Every decor item you see here was found at the dollar store. 
I don't like to keep things for "next year," that being said, I buy things cheap so I can toss it after wards. I'm a lazy mom, I don't want to have clean and store and put things away, especially after planning and hosting a party. 


 Rice Crispy Frankenstein : I added green food coloring to the marshmallows after it was melted. Once the rice crispy cooled to room temperature I cut them into bite size squares, dipped the heads in melted chocolate, added m&m eyes and drew the mouths with melted chocolate and a tooth pick . #SUPEREASY

Pizza Bites - easy, and the kids love it!

Mummy Hot Dogs : I used the crescent rolls in a can and cut them into strips and wrapped them around the hot dogs. Easy , fun and Festive!

Bat Brownies: I found these bat cookie cutters at the dollar store and had no idea what I would use them for until I came across a box of brownies.


The kids love Kool-Aids, I decided to not waste a pumpkin we had gotten for free during a Pumpkin Patch Field trip by gutting it out and placing ice for the drinks to go inside- cute table decor.


Googly Eye Jello - I glued google eyes all around the plastic cup. I then proceeded with orange jello and placed in the fridge for 2 hours. Once the orange layer had solidified I topped it with yellow jello and back in the fridge.  Right before the party we topped it with canned Whipped Cream- the kids love that stuff!


With me being a witch for Halloween- I had to make these witches hat. I used chocolate Girl scout Mint cookies for the bottom and placed melted chocolate to glue the Hershey kisses to the top, added a piece of Halloween candy on the side that I scored at target for decoration.


My husband got into the festive mood by buying dry ice at our local BEL AIR for the punch bowl- this was a real crowd pleaser!


* pictured above, you will see a Cheetos bowl filled with plastic eye balls found at the dollar store.


Whats a kids party with out 
GAMES!
Anytime I have a group of kids over, I have to plan some sort of activity to give them something to do or else they will terrorize my house. Here are some ideas for  simple games you can do at any event!


PLAY DOH : Make pumpkins! I only had to buy 2 colors, green and orange. They were only given plastic spoons and plastic knives. 


RING TOSS
I found this creepy hand at the dollar store and decided to use it as a ring toss game, 
During Halloween its really easy to find those glow in the dark necklace thingys. 
* you can see my witches costume made out of garbage bags from here , lol


  Mummy Wrap :   this game was full of laughs. You can use white streamer paper or you can use toilet paper.


Last but not least, the favorite game of the night.......

The Donut Challenge : 
This was really fun to watch. I had to line all the kids up and hang the donuts at the appropriate height for them. I myself am a Huge fan of donuts and I was thinking of doing a game where the kids can bob for apples but I walked by donuts and this idea popped in my head and so I went with it!  
*I used streamer paper to hang the donuts*


Sunday, November 12, 2017

Home Made Dog Treats : Pumpkin Peanut Butter


My dogs were acting crazy, as usual, and I felt bad that I was always yelling at them, so I decided to show them a bit of labor of love and bake them fresh goodies! Coincidentally I ran out of store bought dog treats, and I decided today... I'm going to make my own dog treats.

 (I got this idea from a health fitness coach that introduced me to Pumpkin scones thingy she made for me once. Thanks Pam- You are the bomb! Phenomenal lady- check her out here Her story is so inspiring and she sends some of the greatest positive messages.   )

Super easy, Minimal Ingredients, and the dogs love this stuff!

Directions:

2 1/2 cups wheat flour
1 cup canned pumpkin
1/2 cup peanut butter
1/4 cup of oil
2 eggs
1tsp of baking power

Mix, roll out, cut, bake for 15min at 325 degrees 

*after note - some people brought it to my attention that Skippy is full sugar, its best to use Natural Peanut butter and also, when using peanut butter please make sure it does not contain a sweeter called 

XYLITOL  THIS IS VERY TOXIC TO DOGS!

ALSO, IF YOUR DOG IS ALLERGIC TO WHEAT FLOUR, THERE ARE OTHER FLOURS YOU CAN USE-  YOU CAN GOOGLE IT, MY DOGS DON'T HAVE WHEAT ALLERGY SO I CAN'T HELP YOU ;)

Mine Craft theme Trunk or Treat

Trunk or Treat 2017


              Years ago I attended my first Trunk or treat event at a local high school. The senior project for those kids was to decorate their trunks in fun themes and they would pass out candy to the kids on Halloween. This was several years ago when my oldest was 4 years old.  That event really left a mark on me because last year for Halloween his school hosted a trunk or treat and I told my self then, in 2017- I would decorate a trunk, and let me they you…. DID I DECORATE MY TRUNK.

                With two boys, Mine Craft is a huge hit. I had two choices, I can either do a mine craft trunk or a star wars trunk, and Minecraft won because I figured, “ hey everything is in blocks, this should be easy.” This process began in August when I started to collect box from work. I started to plan in September and started the process also at that time. I’m a full time mom and I also work full time, so it’s not an easy task for me to spend a weekend to do all of this work, so yes, it took a month for me to complete this project.

Supplies:
·        -  Boxes, Lots of them!
·         - Crafting Paper- I do lots of craft so I had plenty. I did how ever have to run to Michaels to buy brown paper for the treasure chest.
·         - Acrylic Paint- Lots of it! ( Walmart was a life saver for those late night runs)
·         - Elmers glue and a Glue Gun
_     - LED string lights in green and purple ( You can find them on Amazon here )


I started by googling images of Minecraft things and then started to create those images.


My first one was the Pig- It was the cutest thing ever! I made him using crafting paper.


The Enderman had to be hand painted which was surprisingly very easy.  The acrylic paint was very black so I only needed to apply one coat- defiantly glad I decided to use acrylic paint because it is cheaper. I thought about spray painting but decided against it because of the fumes. His eyes were made with pink and purple paper. I got lazy and skipped the arms and legs. * all well*


Of all the things I made, This guy was the creepiest! He is made with white, red, black and 2 shades of gray paper. According to my boys,  in mine-craft, these Ghast come from the Netherportal so I had to look that up.


Of all the things I made, I had the most fun creating the Nether Portal. Half way into cutting the box I had this great idea to paint inside purple and add Lights! I was able to find battery operated LED STRING lights which worked out perfect! they come in different colors and I was able to get these for $6.99 with free prime shipping. ( the tea lights in the image was just for idea, I DID NOT USE TEA LIGHTS)

Outside box is painted black, Inside is painted Purple and the gravel at the bottom was made by cutting 1x1 squares of 2 shades of gray and black paper.


My youngest favorite was the treasure chest. He loved it so much so he started playing with it as soon as we were done making it.

We made with a  taped up box, my husband cut a slit into the box so that the lid can open. I followed behind with brown strips of paper and glued them as the border. I made the lock with gray paper by cutting out a piece of thick cardboard and then glued it with super glue.

We used the treasure chest to hold the candy that we passed out. PERFECT IDEA!


Of course, the final images you see in our trunk or treat where made in the same fashion but I did not document how I did those.

The Tnt box's are made with red paper and white paper. I hand wrote the TNT letters. 


PUMPKINS - where pretty time consuming, I cute 2x2 squares of various shades of orange and glued them randomly all over the box. Eyes and mouth were made with black paper.

Our Creeper was made with Green Acrylic Paint- because lets be serious- I couldn't find green paper big enough, LOL! His eyes are made with black paper .

My kitchen table was a mess for weeks, You can see Rey here hanging out with me.


With every trunk, we had to do a game, I decided to keep with my theme and made a ENDPORTAL. I decided to have this a ball toss game which was very popular! From what I was told, we had the longest line that night of the trunk or treat. I created this box open and used glow in the dark foot balls I found at the dollar store- great idea because as night time creeped it, it made it very easy for us to find the balls.


I made this by opening the lids and super gluing Green, Yellow and Black paper plates that I found at the dollar store. The inside was covered in black paper because I was so tired of painting at this paint. I lined the box with Green LED STRING lights so the kids knew where to aim the balls.


so you all can see how beautiful everything came together at night!