 |
| My Sisters ornament |
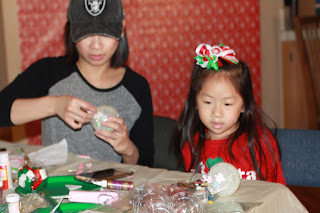
For December I decided to host an Ornament party for the kiddos We made a few different home made ornaments but the one I want to talk about is the one I've been asked alot about-
the UNICORN.
This little beauty was so easy to make, super pretty and supplies were pretty easy to find if you know what you need.
Supplies:
The biggest stress-or for me was hunting down what I needed- I went to several stores when really I should of just gone to Walmart and Hobby Lobby! Heres my break down so you can get in and out of the store, especially during this crazy busy holiday season
Walmart: Craft section - Large White glitter
Cleaning Section - Pledge Floor cleaner
Mini Hot Glue Gun
Hobby Lobby:
Thick Glitter Foam Paper - White and Pink ( 99 cents each, we made 13 ornaments so 1 sheet of each was enough)
Paper Flowers ( in the washi tape aisle) (5 bucks a pack- get 2 or 3. it is expensive but so worth it)
Sculpty Glitter Gold Clay - small pack is $2.99 this was more then enough- no need for the big pack
Black, White and Gold Paint Markers $2.99 each
Michael's :
Clear Ornaments 6 pack. They had the best prices. I bought 4 box for under $20.
How to make it!
Once you've gathered all your supplies, now you can start the fun!
- Make your Unicorn horn - I purposely bought Gold Glitter Clay so I didn't have to go back and apply glitter, I was so happy when I discovered the glitter sculpty! It looks dull in the package but once you bake it - its so pretty! You want to start here because you can bake these while you prep the rest of the ornament. Roll out your clay and wrap them to form a horn - I recommend you make them on the thicker side. Place in the oven for 15min at 325 degree. I wrote everyone's name on aluminium foil so we knew whose horn was whose. It gets confusing with 13 people.
- Prep your Ornament- remove the top and pour a generous amount of floor cleaner inside, swirl it around and then empty the excess. My sister came up with this great idea of place the ornament upside down in a plastic cup as shown here :
3. Using a small funnel or folding paper- pour the glitter inside the ornament and shake it around- DONT BE CHEAP WITH THE GLITTER- Pour alot! empty excess glitter out and toss it.
4. Make your ears. Cut the White and Pink Glitter Foam into triangles and glue to the side of your ornament. Use your hot glue gun- it works wonderfully.
4. Remove Horns from over, allow to cool
5. Using Your black or Gold paint marker - paint on your eyes and write the name of the back of ornament if you wish.
6. Place your ornament cap back on, Hot Glue your Horn in the center and start to also glue your flowers and your done!
This was so easy and so fun for the kids, some of the kids even got creative and used different colors. Skys the limit! My Sister in law got really creative and used the gold paint marker to line her ears!
 |
| This was my little beauty! |
 |
| These sisters got really creative! |
Here are some fun photos from our ornament party! I made an easy back drop for our photos using wrapper paper that I bought from the 99 cent store. One roll was plenty! Great way to add a festive back ground.


